Friday, April 3, 2015

Restoring an old photo

Restoring old photo prints is something I do just for Photoshop practice. There are far better re-touchers out there than me with my meager skills. Today a neighbor asked me if I could take an old photo print scan it into the computer and erase the background as she wanted to share the photo on Facebook but was not happy with the baked goods background. Here is the raw scan...


Raw scan of the 5x7 print after cropping.

After scanning the print at 300dpi, I spent about 20 minutes  extracting the background.


After removing the background,

Workable but my neighbor is a very nice person and deserves a better image for her Facebook avatar. Back to Photoshop...2 hours later, a new background, color correction and re-lighting...


Unfortunately some of the highlights  were blown out 
in the print a little beyond Photoshop's ability to recover


Sunday, March 1, 2015

and now for something completely different..

decals, and not just your everyday run of the mill standard flat bumper sticker types, these are 3D and look really special. The hard part is to make these look as good in a photo as they do in real-life. The task is to shoot the 4 colors on a neutral white  at several different angles to show off the raised texture unique to this product. The problem is to keep the background uniformly lit. 


Initial shot with minimal post processing. Notice the slight
color variation caused by a slight difference in the color
temperatures of the lights from left to right (cooler lamp
on the right). Something we'll fix in the finals.


The solution was to raise the decals on a glass sheet 6 inches above the background and light the subject and background separately. 2 lights for the product and 3 lights for the background. A mono-light with a 24 inch softbox from camera right to light the product and the right side of the background. A mono-light with a 2 inch snoot off camera left to provide hard shadows showing off the texture and spilling onto the left side of the background. Finally a speed light with a 12 inch softbox to smooth out any shadows on the background. 

The angles shots required a different approach. The background showed an annoying drop shadow from the samples so we placed the product directly on the white background material. This got rid of the drop shadow but required  more post processing in Photoshop.

The small shadow in this series helped bring out the 3D design.

Tuesday, January 13, 2015

We Love the Small Jobs

Small jobs usually afford much more creativity on the photographer's part because there is usually no creative director, art department or brand guides to follow. The budget just isn't there. These new entrepreneurs are usually a "one man band" doing all the work to launch a fledgling business. At some point the product needs to be photographed for the web, catalogs, and other advertising. These clients tend to rely on us for design and style choices unlike the more directed projects. These clients have a general idea for how the product should be presented but it falls on the photographer to bring the vision into focus. The job is to shoot the product and design a table stand graphic for use in various upscale salons.

Here the client supplied a photo of
where these displays will be used. 

The client vision was a silver toned image. We shot the product against a silk curtain leaving the folds in view  to give a slightly soft feel to a spartan design.

After a few trial product layouts, here is the final design.

The final display design.

Done in about a day, we had fun playing with the ideas and implementation. 


Saturday, December 20, 2014

We would like to welcome Dixie Belle Paint to our family of clients. We have been commissioned to update their extensive catalog of products with professional true to color catalog shots on white sweep and compose a series of environmental shots showcasing the country craft quality of the product.

Primary line of  27 paints including colors like "Florida Orange" and "Flamingo"

Natural China hair brushes.

Shooting bottled product on a white sweep is not particularly difficult, but, keeping colors accurate can be a challenge. Here the black glaze is actually blue before the coating dries. Having a fully color calibrated equipment and workflow is the key to faithfully reproducing the unique colors in this or any other product line. Controlled lighting with a known color temperature, 6500°K, is only one part of the mix. A fully calibrated camera and workstation are also required.

Glazes and clear coats.

Glaze close up detail shot.


The camera is custom balanced to a standard gray card and also RGB values are calibrated to a known standard to keep the shots consistent across the entire range of hues and re-calibrated before each set change. The workstation is calibrated weekly with a colorimeter. We use only one workstation for final processing to eliminate any hardware variables that could slip into the process.

Kudzu green.

Kudzu green with neutral gray card.

The white sweeps are actually shot to light gray to stay consistent across the product line and allow the white colors to stand out more. There is more than enough separation to "knock out" the products if needed later.

Saturday, November 22, 2014

Often times I am asked to photograph interesting items for lobby and other displays. Here the owner of some interesting scale weights which I understand were once commonly used to weigh opium around the turn of the century in East Asia. The client commissioned me to create an art piece for the wall in his office.

After much arranging and fiddling around with the layout and lighting the client chose this photo which was further processed in Photoshop to achieve a subtle duo-tone effect to fit well with the colors and furnishings in the room. The total shots taken with different light and layout were around 250. Of which I chose the top 5 and the client chose the final image.

Lighting was ambient room light from a south facing window on a very overcast day giving wonderfully soft directional light from camera left and a few bright spots along the smooth worn areas of the bronze. A white fill card was added off camera right to bring some details into the shadows but still keep the shape definition of the pieces. The final print 22x16 inches does not have the watermark.

Nikon D90 105mm prime with a macro bellows
f/6 at 4 seconds ISO 400

See more examples on my Flickr page at  www.flickr.com/michaelsrichter/

Monday, October 27, 2014

New Product Launch - Natural Sponge

The client is starting a new line of products on Amazon and has to be shot to Amazon's specs. Not the most glamorous work, but important. Not all jobs afford you the greatest creative latitude, sometime  you just shoot to spec.
Natural sponges are becoming all the rage after many years of declining sales. Tarpon Springs Sponge Docks (http://www.ctsfl.us/) is about the only place where sponge diving survives in the USA to this day and one of my favorite places to visit in the local area. So I was very happy to get the opportunity to shoot  this new line for Better Living Labs (http://www.betterlivinglabs.com). All the sponges are sourced and hand picked directly from vendors in this small community.

Local gift shop at the docks displays a variety
of Grass and other sponges

Sponges range in quality and variety from decorative Grass Sponges to the smaller tightly celled Wool Sponges used mostly in cosmetics and in the healthcare industry. 

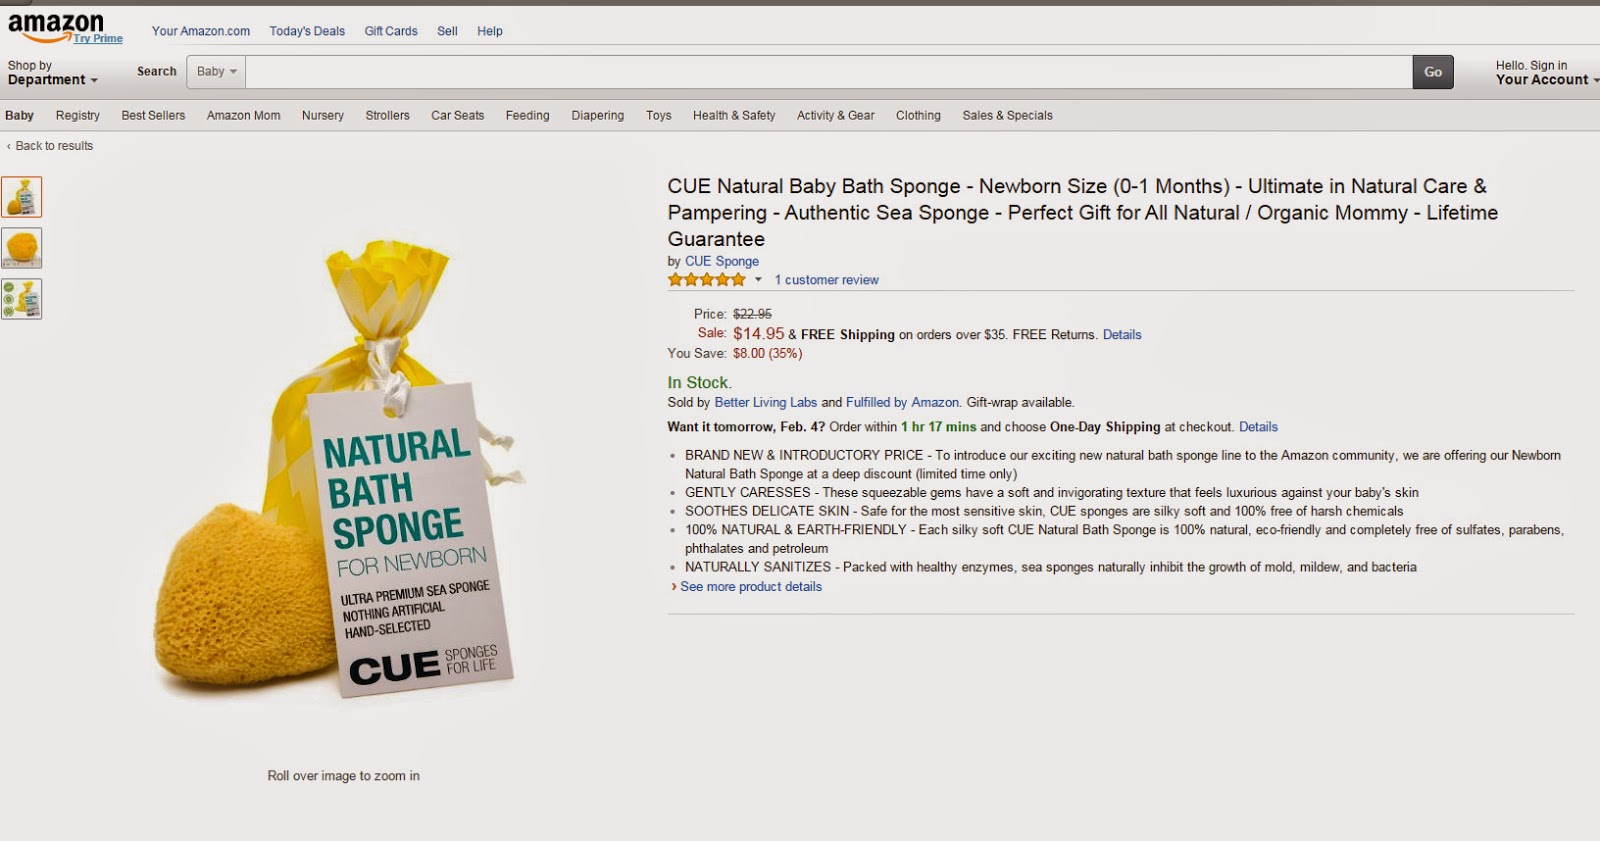
This may be a small job for the studio but it deserves all the care and attention demanded by our larger clients. The client wants the colorful packaging to shine and the quality of the product to come through for this series shot to Amazon's catalog specs. (shot on white sweep w/o any props). Here is a sample of the initial proofs.

Just a modest amount of post processing, basically 
strait out of the camera.
With items like this I like to shoot with a light meter. Lots of white will fool the camera light sensor into under exposing the shot where an incidence meter can not be fooled.

And some of the finals...


Sponges on Amazon


Sunday, September 14, 2014

Artwork Reproduction

Another facet of the business is to photograph other peoples art , in this case, for reproduction as a color plate in biographical book about the artists of Woodstock, NY. The art must be evenly lit, show the texture of the medium in this case oil on canvas, be color accurate, and of course, be perfectly square with no distortions. The more you can get right in the camera; the less you'll have to do in post.

The painting is roughly 28"x34". Ideally I would use a 200mm lens and move back far enough to fill the frame of my D600 Nikon. Unfortunately this configuration is pushing me beyond the size limits of my small studio. The alternative is to switch to my 28-70mm set to 70mm and moving the camera to fill the frame. This will introduce a small amount of distortion which you would normally not notice but with a rectangular object close to the edges of the frame, its obvious but fixable in post.

Next problem is the sensor plane must be perpendicular to the canvas to prevent any keystone distortions. The painting is on an easel tilted back therefore the camera needs to be positioned high and tilted down.

Now that the camera and painting are in position, its time to bring in the lighting. Dried oil paints are very shiny and often have lots of texture which creates a lot of unwanted specular highlights. The goal is to get rid of the speculars but not loose the texture and brush strokes. This was solved by raising the key light very high and directly above the subject, moving most of the specular reflections below the angle of the camera and giving some relief to the texture because of the side lighting. Distancing the light source helps reduce the light fall off. The addition of a 40" silver reflector under the painting bounces just enough light back to the bottom to even out the lighting.


D600 24-70mm @70mm, 1/160, f/8, ISO 100
Artist: Nan Mason, 1932

Color correction done with a gray card along with minor contrast and distortion adjustments in post complete this project.